Waterwingz (talk | contribs) (→Links) |
Waterwingz (talk | contribs) (→Links) |
||
| Line 259: | Line 259: | ||
loader for cameras with low memory : [https://app.box.com/s/j8kqbb33uywra0t9kj5m] |
loader for cameras with low memory : [https://app.box.com/s/j8kqbb33uywra0t9kj5m] |
||
| − | version 1 of the script : |
+ | version 1 of the script : [KAP_%26_UAV_Exposure_Control_Script_V1] |
Revision as of 02:23, 23 March 2014

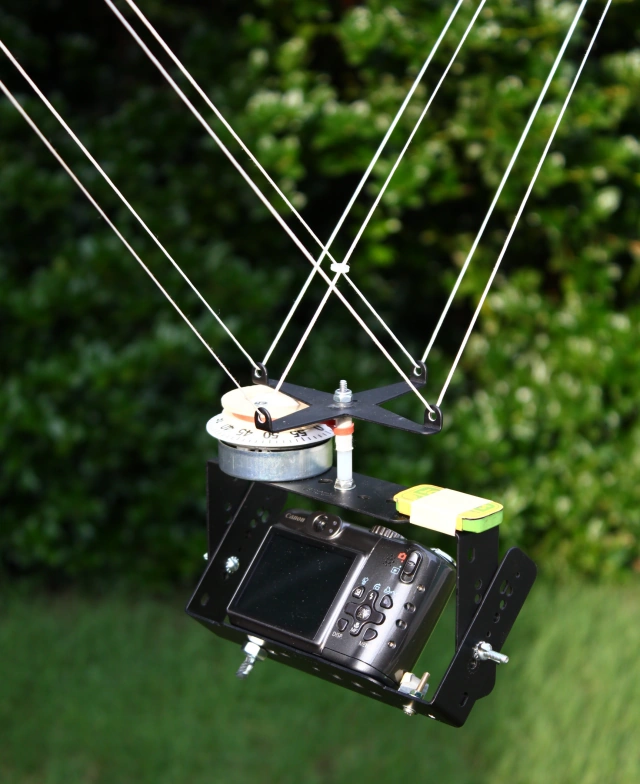
This page desribes a script designed for use in KAP & UAV applications. It may also be useful for balloon photography.
Download Link : KAP & UAV Script Download Link
Forum Thread : CHDK Forum Thread for KAP_UAV script
Releases :
- v1.1 on Oct 10 2013 - initial release
- v1.2 on Nov 21 2013 - minor changes to USB mode and focus at infinity operations
- v1.3 on Dec 08 2013 - fixed handling of ND filter on cameras without adjustable apertures
- v1.4 on Dec 15 2013 - adds a minimum Tv setting to limit the slowest shutter speed that the script can use. Also adds an option to power the camera off when the specified shot count is complete.
- v1.5 on Dec 21 2013 - converted from set_backlight() to set_lcd_display() to turn off the display
- v1.6 on Jan 25 2014 - camera placed in playback mode when USB control is enabled and USB power is not present
- v2.2 on Mar 22 2014 - adds video recording, more robust and simplified focus at infinity, autodetect of ND filter and adjustable aperture, ND filter enable/disable,
Overview
The KAP Exposure Control Lua script automatically controls shutter speed, aperture, ND filter, and ISO settings so as to maintain the fast shutter speeds needed in kite aerial photography (KAP) and unmanned aerial vehicle photography (UAV). With these applications, the camera is almost always moving, and resulting motion blur is often a big obstacle to getting sharp pictures. Simply setting the shutter speed to a fixed fast value may not allow enough flexibility when lighting conditions are variable. This script actively manages all exposure inputs in order to keep the shutter speed fast, but will allow slower speeds if necessary to get proper exposure.
Features
- interleave video and still images (new in version 2)
- user defined preferred values for Tv, Sv, Av
- user defined ranges of Tv, Sv, Av to use
- ND filter can be enabled to engage on high brightness
- sophisticated exposure calculations
- all input and output values displayed in "real" camera terms rather than APEX96 values
- intervalometer
- startup delay
- camera power off after shooting completes
- exposure compensation
- focus lock at infinity
- preset zoom position
- turn off display backlight
- shooting enable / disable via USB remote signal
- configurable for cameras with or without adjustable iris and ND filter
- logging
On Screen Display
 Script startup showing initial values selected.
 First two shots - note metered vs calculated values used.
Calculation Algorithm
For a camera with no ND filter and no adjustable iris (the "Tv-only" case), the script works as follows :
- the script meters the scene and determines if the picture can be properly exposed using your target Tv (1/1000 second) with ISO somewhere in the range of Min (100) to Max2 (800). If that's possible, it takes the picture at the appropriate ISO.
- if the scene brightness is too low with ISO at Max2 (800), it slows the shutter speed from target, enough to get a good exposure.
- if the scene brightness is too high with ISO at Min (100), it raises the shutter speed enough to get a good exposure, which may be above your maximum setting (1/2000).
For a camera with an ND filter but no adjustable iris :
- the script performs the TV-only calculation described in A above
- if the resulting shutter speed is above your Max setting (1/2000), it inserts the ND filter, lowers the meter reading by three stops, then does the Tv-only calculation again.
For a camera with an adjustable iris, but no ND filter, the script works as follows:
- The script meters the scene, and determines if the picture can be properly exposed using your target Tv (1/1000 second) and your target Av (f/4.0), with ISO somewhere in the range of Min (100) to Max1 (400). If that's possible, it takes the picture at the appropriate ISO.
- If scene brightness is too low with ISO at Max1 (400), it lowers the f-stop setting as needed, down to your Min setting (f/2.8).
- - If still more exposure is needed, it raises the ISO, up to your Max2 setting (800).
- - If still more exposure is needed, it slows the shutter speed below target to get a good exposure.
- If the scene brightness is too high with ISO at Min (100), it raises the shutter speed, up to your Max setting (1/2000).
- - If exposure is still too high, it raises the f-stop, up to your Max setting (f/8.0).
- - If exposure is still too high, it raises shutter speed above your Max setting to get a good exposure.
For a camera with both an adjustable iris and an ND filter, the script works as follows:
- The script withdraws the ND filter, then performs the iris-only calculation described in C above.
- If the resulting shutter speed is above your Max setting (1/2000), it inserts the ND filter, lowers the meter reading by three stops, then does the iris-only calculation again.
Note that in very high scene brightness, the algorithm may yield a shutter speed higher than your Max setting, and even higher than your camera's highest nominal setting. Under CHDK such fast shutter speeds may indeed work, but may not be reflected in the EXIF data for the picture (which may only go up to about 1/2000 second). If that occurs, the log data will reflect the actual settings at which the picture was taken.
Also remember that for cameras with an iris, if you use the zoom settings to zoom in to any amount, your camera's minimum f-stop will go up. The script will automatically adjust your minimum and target Av settings if needed. This may be the explanation if your EXIF aperture data shows higher f-stops than your settings call for and you are using zoom.
Setting Focus at Infinity
The script offers several methods to automatically focus at infinity using the :
- Focus @ Infinity Mode
user parameter.
Not all methods work with every camera so some experimentation may be required to find the one that works for yours. Release 2 of the script automatically selects the best focus method for CHDK release 1.2.0 or 1.3.0 versions.
Listed below is a description of the various included method, Even with those. you may have to edit the script to customize one of the methods to work with your camera.
None : tells the script not to attempt to set the focus at infinity
@shot : tells the script to focus at infinity prior to each shot. Some cameras do not require the use of Canon AFL or MF moded to focus.
AFL : sets the camera into Canon AFL ( auto focus lock ) mode and sets the focus to infinity.
MF : sets the camera into Canon MF ( manual focus ) mode and sets the focus to infinity.
Note : if this parameter is selected, the script onscreen log will display an warning message in red & white if the focus does not lock at infinity.
Application Notes
1. The script assumes the cameras ND filter effect is the equivalent of 3 f-stops. Change the value of the variable nd96offset in line 93 if this is not the case.
2. While the script is running, you can stop it "cleanly" by pressing the MENU key. Pressing any other key will cause the display/backlight to activate for about 30 seconds, allowing you to check the script status. Pressing anything other than MENU again will increment the amount of time that the display/backlight stays enabled.
3. This script requires CHDK 1.2.0 (or higher) and build 3149 (or higher)
4. As always, CHDK is experimental and while very stable, it is not perfect. Use at your own risk.
Parameter Setup
Shot Interval
- Specifies the time between shots in seconds.
- values 2 - 120 seconds
- default 15 seconds
Total Shots
- Defines how many shots the script will take before returning the camera to playback mode.
- values 1 - 10,000 ( 0 = infinite )
- default 0 (infinite)
Power off when done?
- Causes the camera to completely power off when the total shot count is reached. If not selected, the camera will go into playback mode when the total shot count is reached.
- default Disabled
Exposure Compensation
- Works like the built-in Canon exposure compensation, allowing the exposure reading to be offset by up to two f-stops.
- values -2 to +2 f-stops ( in 1/3 f-stop increments)
- default 0.0
Start Delay Time
- Allows a delay at script start before shooting starts - giving time for the kite or UAV to reach a desired altitude.
- values 0 - 10000 seconds
- default 0
Tv Min
- Defines the lowest shutter speed that will be used. Note that the algorithm will not try to go below this value to get the correct exposure, possibly resulting in underexposed images that will need to be fixed in post processing. Used to prevent motion blurr when the illumination is poor.
- values None, 1/60 to 1/640 sec
- default None
Target Tv
- Defines the desired shutter speed - usually set to a fast shutter speed like 1/1000 sec
- values 1/100 sec to 1/2000 sec
- default 1/1000 sec
Tv Max
- Defines the maximum shutter speed that will be used before the ND filter (if present) is inserted. Note that the algorithm may try to go above this value to get the correct exposure as a last resort, depending on CHDK's ability to extend the shutter speed.
- values 1/1000 to 1/10000
- default 1/2000 sec
Lowest Av
- Used to define the lowest aperture setting to be used.
- values f1.8 to f8.0
- default f2.8
- only used for cameras with adjustable apertures
Target Av
- Defines the desired Av setting (usually the lens sharpness "sweet spot")
- values f1.8 to f8.0
- default f4.0
- only used for cameras with adjustable apertures
Highest Av
- Defines the maximum usable Av setting
- values f1.8 to f8.0
- default f8.0
- only used for cameras with adjustable apertures
ISO Min
- Defines the lowest ISO sensitivity value to use
- values 80 100 200 400 800 1250 1600
- default 100
ISO Max1
- Defines the maximum ISO to be used during "normal" shooting.
- values 100 200 400 800 1250 1600
- default 400
ISO Max2
- Defines the ISO value to be used when the ISO Max1 value cannot be used to achieve correct exposure
- values 100 200 400 800 1250 1600
- default 800
Allow use of ND filter?
- Enabled / disables the script's ability to use the ND filter (if available).
- values No Yes
- default Yes
Zoom position
- Specifies the position to set the zoom lens at the start of shooting.
- range Off, 0-100% in 10% steps
- default Off
Focus Lock
- Several modes to lock focus at infinity. Some of these will not work with all cameras - some experimentation may be necessary
- values Off @Shot AFL MF
- default Off
See the Setting Focus at Infinity section above.
USB Shot Control
- Enables the camera's USB port to be used for shooting control. When the 5V USB signal is present, normal script operation occurs. When the USB ports is at 0V, the script pauses.
- values Off / On
- default Off
Backlight Off
- Disables the LCD backlight after a 20 second delay.
- values Off/On
- default On
Logging
- Specifies where log message go.
- values Off Screen SDCard Both
- default Both
Links
loader for cameras with low memory : [1]
version 1 of the script : [KAP_%26_UAV_Exposure_Control_Script_V1]