IMPORTANT: The content of this page is outdated. If you have checked or updated this page and found the content to be suitable, please remove this notice.
Diese Seite ist veraltet, aktuelle Informationen sind im neuen Handbuch zu finden !
Der <ALT> Modus deaktiviert die normalen Funktionen der Kameratasten und verleiht ihnen eine alternative Bedeutung. Dieser Modus sollte normalerweise deaktiviert sein! Er wird nur gebraucht für das Hauptmenü, zum Starten eines Skriptes und für bestimmte Shortcuts.
Wie wird der alternative Modus <ALT> aktiviert :
A-series: drücke den Knopf [direct print]
S3 IS: drücke den Knopf [shortcut] .*
(*)Hinweis für die S3: Den ersten Knopf den drücken nachdem sie den alternativen Modus <ALT> aktiviert haben aktiviert den kompletten Funktionsumfang der hinterlegten Funktionen. Um dies zu verhindern, halten sie den [flash] Knopf, und drücken sie gleichzeitig den von Ihnen gewünschten Knopf gleichzeitig.
Zum Beispiel:
[shortcut] key = führt <ALT> Modus aus(ohne den Modus selbst zu berühren oder das eine Funktion ausgeführt wird)
[flash]+[menu] key = bringt sie ins Hauptmenue der Konfiguration(ohne den Modus selbst zu berühren)
Bei der erneuten Ausführung des [shortcut] key wird der <ALT> Modus beendet ohne eine hinterlegte Funktion auszuführen .
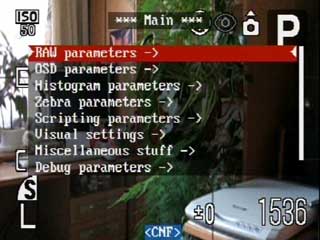
Hauptmenü[]
Um ins Hauptmenü zu gelangen drückt man den [Menu] Knopf im <ALT> Modus. Um ins vorige Menü zurück zu gelangen drückt man am besten den [Display] Knopf.
Extra Photo Operations[]
Override shutter speed (Shutter speed enum Type = Factor)
Erlaubt das Überschreiben der Verschlusszeit. Wenn der Shutter speed enum Type auf Factor steht wird die eingestellte Verschlusszeit mit dem eingestellten Wert überschrieben. Das überschreiben funktioniert nur im M, Av, Tv und P-Modus (?). Um die Belichtungszeit zu überschreiben muss der Value factor einen Wert <> Off besitzen. Der Value factor bestimmt hierbei den Multiplikator vor der Override shutter speed. Ein Override shutter speed von 10 und ein Value factor von 1/1000 ergibt daher eine Belichtungszeit von 10/1000 = 1/100. Es ist zu beachten, dass nicht alle Werte korrekt in dem Display angezeigt werden, da hier nur die offiziell unterstützten Belichtungszeiten angezeigt werden können.
Override shutter speed (Shutter speed enum Type = Ev step)
Erlaubt das überschreiben der Belichtungszeit in Ev-Schritten. Der Value factor (Wert) muss hierbei auf 1 stehen damit die Einstellung aktiv ist. Dieser Modus scheint im M, Av, Tv und P-Modus zu funktionieren. (?)
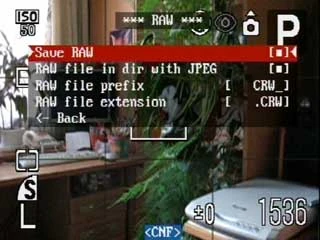
RAW parameters menu[]
Save RAW
Speichert RAW-Files während der Aufnahme.
Diese Option ist auch einstellbar durch die Tastenkombination <ALT> + [+/-]. Für die Powershot S3-IS lautet die Tastenkombination zum Ein- und Auschalten der RAW-Speicheroption <ALT> + [FUNC] (Funktionsknopf). Maybe you also want to hold the [flash] button meanwhile, see here.) When a RAW file is saved, on A-series cams the blue light in the [print] button will blink once and on the S3, the orange light on top will blink once. Note that only one RAW file will be saved when you use the continuous shooting mode or the build-in bracketing mode (which only the S3 has) of your cam, so you might want to use scripts for this. Here is a short explanation how to process RAW files on your computer.
RAW file in dir with JPEG
Save RAW-files in the same folder as the JPEG-files. If switched off, RAW-files are always saved in 100CANON folder.
RAW file prefix
Prefix of RAW-file name.
RAW file extention
File extension of RAW-file.
On screen display[]
Show OSD
Show OSD elements or not. There's a shortcut available to toggle this on/off quickly: [half shoot]+[right].
Show RAW/SCR/EXP state
Show status:
RAW - Saving of RAW-files is enabled.
SCR - Script is running.
EXP - Over or Under exposure is detected.
Show misc values
Show values:
Z: - Zoom position
F: - Focus distance in meters
Av: - Aperture value
Zoom value
Decides how the Zoom position (Z) is displayed when "show misc values" is active.
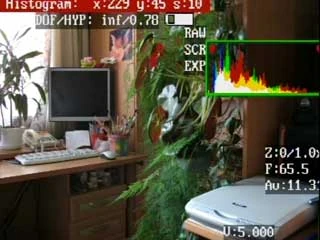
R1: - nearest distance which will still be in focus
R2: - farthest distance which will still be in focus
DOF: - distance between these two points
HYP: - hyperfocal distance
Compare R1 and R2 to the the actual focus distance (F) to see which parts of your picture will still be in focus. Set your focus point (F) to the hyperfocal distance (HYP) and everything from some near distance to infinity will be sharp.
OSD layout editor
Battery parameters
Layout editor[]
Allows to adjust OSD elements on the screen. The following buttons are used:
[Set] - to switch between elements.
[Display] - to change the step-size, 1 or 10 pixels, of how far the display features are moved with each direction pressed, affording precise placement.
Battery menu[]
Voltage MAX
Set battery voltage for 100% remaining. (Default value: 5150 = 5.150v) If you want a more accurate battery-meter: when inserting new batteries check their full-charge voltage with the 'Show Volts' feature and set this accordingly.
Voltage MIN
Set battery voltage for 0% remaining. (Default value: 4550 = 4.550v) Increase this value if you want more warning time before your batteries run out.
25+ step
Change increment step for inputting new voltages (above).
Show percent
Show Battery Charge in Percentage, 100% >> 0%
Show volts
Show Battery Charge in Volts (in .001 volt increments)
Show icon
Display Battery Charge Icon (icon turns red when voltage is low.)
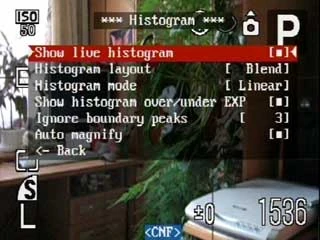
Histogram menu[]
Show live histogram
Enable display of Live Histogram. There's also a shortcut available to toggle this on/off quickly: [half shoot]+[up]. The Histogram will be shown when you half press the [shoot] button in Rec mode or Playback mode. (Explanation of histograms and how to interpret them.)
Histogram layout
Select one of the 7 Histogram styles that you want to display.
RGB - Red Green Blue
Y - Luminance
Histogram mode
Histogram graph scale:
linear
logarithmic
Show histogram over/under EXP
Displays small warning diamonds in histogram window, and EXP is displayed (when enabled), when there's under or over-exposure.
Ignore boundary peaks
Does not take into account N boundary values during the normalization (scaling) of histogram. For example, if there are overexposure and/or underexposure, left and/or right peaks become large, and the remaining part of the histogram degenerates into thin strip on the bottom during normalization process. The purpose of this parameter is to avoid such situations by not taking into account the specified number of boundary values.
Auto magnify
Automagnification of histogram in case if histogram takes less than 20% of total area. The coefficient is chosen in a way to get histogram at least 20% area filled. It also helps to examine histogram. The cut peaks are markered in red color on top. A number above the histogram - coefficient of magnification.
Note. The scaling of histogram is always done only in vertical direction.)
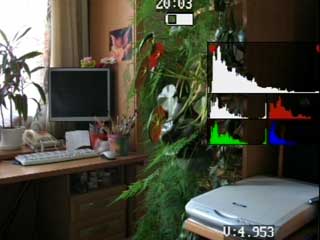
Blended
RGB_Y_R_G_B
R_G_B
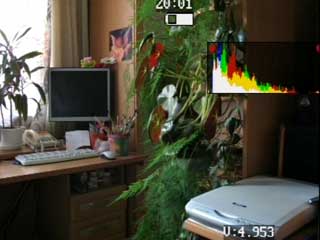
RGB and luminance histograms
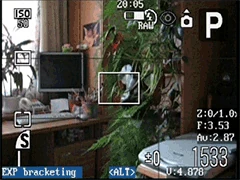
Live histogram example[]
Zebra parameters[]
Zebra mode is a screen overlay which points out very bright/very dark areas. You can use it like the histogram to avoid over-/underexposure. It is shown in playback mode and record mode when you half press the [shoot] button. You can change the colors of the overlay in the "visual settings" menu.
Draw Zebra
Activates Zebra mode. There's a shortcut available to toggle this on/off quickly: [half shoot]+[left].
Blink 1-3 - Draws solid, blinking parts. It will show the normal OSD elements during the pauses of the zebra overlay. 1, 2, and 3 = number or seconds between blinks.
Solid - Draws all light/dark parts of the image in a solid, non-blinking way.
Draw UnderExposure
Choose the amount of underexposure to be shown.
0 = off
1 = show only pure black as underexposed
Numbers larger than 1 = show parts which are increasingly brighter as underexposed.
Draw OverExposure
Choose the amount of overexposure to be shown. Again: larger numbers = show more areas as overexposed.
Restore original screen
Restores the original camera icons and exposure information between Zebra mode blinks (when Zebra mode is set to blink).
Restore OSD
Restores CHDK's OSD icons and display information (DOF calc, Histogram, etc.) between Zebra mode blinks.
Draw over zebra
Nothing
Histo
OSD
Enable/disable display of Histogram or OSD-elements while Zebra mode is also being displayed.
Note: Normally if one of the Blink modes is in use and Restore OSD is enabled, you'll only see the histogram during part of the blink-cycle (when the Zebra mode is not visible). These option allow the histogram and OSD elements to be displayed at all times when Zebra mode is also visible -- during the usual half-shutter press, of course.
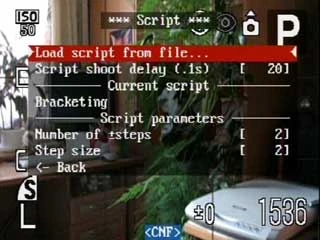
Script menu[]
HDK allows you to automate your camera by running "scripts", small and simple programs written in a short-hand version of BASIC. To run a script you load one into memory. Then while <ALT> is displayed on your screen, you just press the shutter button. You may interrupt a running script by just pressing the shutter button again. See this page for further information on writing scripts: Scripting Language
S3 IS User's: Hold down the [Flash] button (top-left of flash-unit) before pressing the shutter-button when in <ALT> mode or doing so will change your Shortcut option just before executing the script.
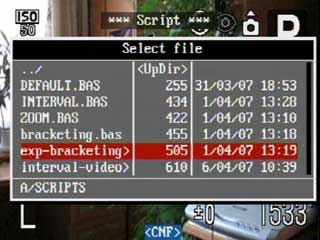
Load script from file...
Upload a new file script from your /SCRIPTS/ folder.
Script shoot delay (.1s)
A small time-delay after a shot is taken, before the next command in the script is executed. You may need to increase this to get some scripts to run properly. Or lower it to speed them up if the script will allow for it. If you can't get a script to run it is most likely this setting that is preventing it from working properly.
Current script
The name of the current script you are running.
Script parameters
Change any variables related to the script you are running. These values remain in memory until you change them. When running a new script be sure to set new values accordingly.
Script mini-console[]
This text is displayed as you run a script. Defined in the script itself by the "print ..." commands. A well-written script will have helpful messages to let the user know what is taking place while it is running or when special instructions are needed.
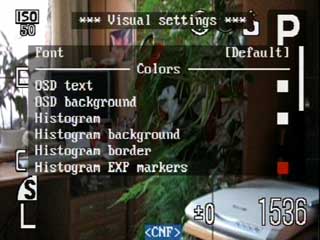
Visual settings menu[]
Font
Choose from 4 fonts available.
Colors
Change any of the display colors for all your text and icons. If you don't change them they will remain as their defaults. There are opaque colors and transparent colors, and also some "special effect" colors. Note that record mode and playback mode use different color tables. So it may happen that you pick a nice color in playback mode, and in rec mode it will look totally different. But there are also colors which will stay the same in both modes. Some examples for A-series cams: 0x11(white), 0xFF(black), 0x22(red), 0x55(green), 0x44(transparent light grey)
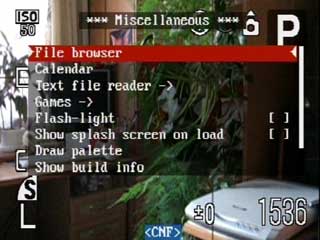
Misc[]
Fun and helpful things you can do or use.
File browser
See what files are on your SD card.
Calendar
A handy perpetual calendar to look up dates.
Text file reader
Read any text file on your SD card. Make a sub-directory called /BOOKS/ and put something there to read on vacation.
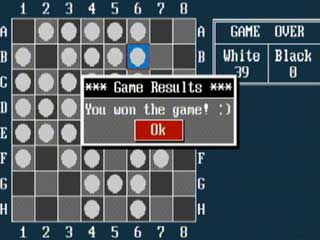
Games
Reversi, Sokoban
Flash-light
Turns your LCD panel into a flashlight! When in Record Mode and the LCD panel is swiveled facing forward, the LCD display turns all-white so you can see your way around in the dark, or to illuminate some close object to photograph. (Note: In actual use this does not work for photography purposes. The LCD turns dark during the actual exposure. But if you are ever lost on a hiking-trail on some dark and gloomy night, won't you be glad that your camera might save you? :-) )
Show splash screen on load
Shows a splash-screen that the HDK Firmware is loading, for 2.5 seconds.
Draw palette
Show current palette
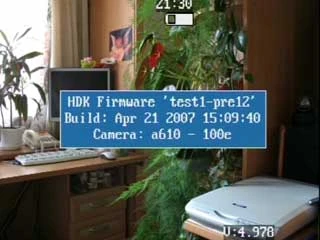
Show build info
Show current build of HDK
Show memory info
Free memory available.
Calendar[]
Shortcuts:
[up], [down] - change a year
[left], [right] - change a month
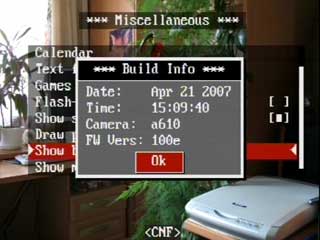
Build info[]
Date of build.
Time of build.
Camera model.
Version of original firmware.
Memory information[]
File browser[]
Allows to navigate on SD-card using arrows keys. To page up/down you can use zoom lever. Also, you can delete files and directories by pressing [Erase] button.
File deleting[]
This is particularly handy if you are shooting RAW files and using a filename extension other than .JPG for your RAW files. The camera does not recognize nor display RAW files directly. Deleting images from your SD card with the [Erase] button or the [Erase All] menu options will have no effect on the RAW files you have shot. If you need to delete RAW files you can use the 'File browser' and 'File deleting' feature. You can also delete whole non-empty directories, as long as they don't contain any subdirectories.
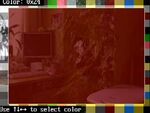
Palette
Palette
Palette browser[]
Can be used to test the colors and transparencies for use with menus, icons, and fonts. Or you can just enjoy all the pretty colors. Are you having a bad day? Choose a rose-colored transparency and view your world a better way. :-) Some of the subtle transparent colors have an interesting shift on the real-world view, acting like special-effects filters. Perhaps future updates of HDK might make use of this? (Your own extensive special-effects filter library.) Note that color palettes are different for rec mode and playback mode, see here.
Text Reader menu[]
Open new file...
Open a new file on your SD card.
Open last opened file
Opens the last file you were reading.
Select RBF font
Select the font (the default location opens a /FONTS/ folder off the root-directory of your SD card). You can download fonts here or add you own fonts using RBF Editor. Hint: If you have many fonts in many sizes and attributes, put all the files of the same font in sub-folder named for that font. Then you can just open each font's folder to select a new size, instead of tediously scrolling through dozens and dozens of fonts in all their sizes and attributes. A real time-saver to help in selecting the most legible font.
Codepage Win1251<->DOS
Text Encoding (to enable viewing of Windows or DOS text-file formats)
Enable autoscroll
Automatically scrolls your Text Reader display according to the Autoscroll Delay setting.
Autoscroll delay (sec)
Time in seconds to pause between each Text Reader screen when Autoscroll is enabled.
Text reader[]
When exiting it memorizes the last-viewed position of the text, setting a bookmark. When using the "Open last opened file" option your viewing will resume right where you left off. This bookmark is discarded when loading a new/different file.
You can use [Display] button to pause autoscroll if it is enabled.
You have to push your orange boxes and leave them on blue destinations. When an orange crate is placed on a blue destination it will turn yellow. When all your boxes are on a destination spot and have turned yellow you have won that round. Level 1 requires 108 moves. Level 2 requires 107 moves. Can you do it? There's 116 games/levels. (Just in case you are curious, level 116 requires 207 moves.)
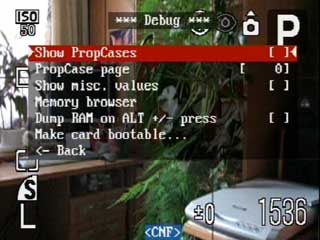
Debug menu[]
Most options here are used by program developers to view internal memory locations in the camera or code (List of known Property Cases). However, there is one very important option here for the end-user:


