Please note:
Most DNG4PS2 users will never need to use the calibration function. Calibration is only required when:
Adding support for a camera
Refining the color matrix for a currently supported camera
DNG4PS-2 converts CHDK RAW files into the more widely acceptable DNG format. To do this it needs to understand the color range produced by the camera to allow programs to interpret the picture correctly. Helping DNG4PS-2 understand a camera's color range (gammut) is a process referred to as calibration.
This article will describe how to use DNG4PS-2's inherent calibration functionality. More accurate techniques are available but require equipment not typically available to end users. Done properly these approximate color matricies can produce quite usable results.
If you have exiftool installed, the following command will help verify that the target photo adheres to the steps above. The command has been word wrapped for convenience, and should be concatenated into a single line:
exiftool -p "Req 1) Progam/Manual mode: $Canon:EasyMode ($ShootingMode)"
-p "Req 2) Best jpeg quality: Quality=$Canon:Quality Size=$Canon:CanonImageSize"
-p "Req 3) White balance to daylight: $Canon:WhiteBalance"
-p "Req 4) Switch off all effects: Color Mode=$Canon:MyColorMode"
-p "Req 5) Exposure compensation to -2/3: $ExposureCompensation"
-p "Req 6) Focus to infinity: Range=$Canon:FocusRange,
 Focal Type=$Canon:FocalType, Focus Mode=$FocusMode (AF Mode=$Canon:AFMode)"
-p "Req 7) Zoom to middle: $Canon:ShortFocal < $Canon:FocalLength (midpoint?)
 < $Canon:LongFocal (Digital Zoom=$Canon:DigitalZoom, Macro=$Canon:MacroMode)"
-p "Req 8) Flash to off: $Flash" -p "Req 9) ISO to lowest value: $Canon:ISO
 (Base=$Canon:BaseISO)"
-p "Reference Information: Model=$Model ($Canon:CanonModelID)"
-p "Reference Information: Dimensions=$Canon:CanonImageWidth (Width)
 x $Canon:CanonImageHeight (Height)" <JPEGFilenameGoesHere>
This will produce an output similar to the following for the nominated file (<JPEGFilenameGoesHere>):
Req 1) Progam/Manual mode: Manual (Program AE)
Req 2) Best jpeg quality: Quality=Superfine Size=Large
Req 3) White balance to daylight: Daylight
Req 4) Switch off all effects: Color Mode=Off
Req 5) Exposure compensation to -2/3: -2/3
Req 6) Focus to infinity: Range=Manual, Focal Type=Zoom, Focus Mode=Manual Focus  (3)
 (AF Mode=Off (Manual Focus))
Req 7) Zoom to middle: 6 mm < 10.2 mm (midpoint?) < 72 mm (Digital Zoom=None, Macro=Normal)
Req 8) Flash to off: Off
Req 9) ISO to lowest value: 81 (Base=79)
Reference Information: Model=Canon PowerShot S5 IS (PowerShot S5 IS)
Reference Information: Dimensions=3264 (Width) x 2448 (Height)
Please note that in the example above requirement 7 (zoom to middle) has not been met because the zoom (10.2 mm) is not near the half way point between the minimum (6 mm) and maximum (72 mm) zoom values.
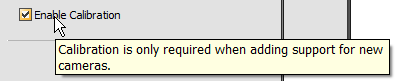
Enabling Calibration[]
To enable calibration you must first have installed DNG4PS-2 version 0.2.2 beta 25 or later. By default the calibration function will be disabled.
To enable it select the Settings button, select the Enable Calibration option, then select the OK button.
The Calibr button in the main program window should now be enabled.
Calculating Matrix[]
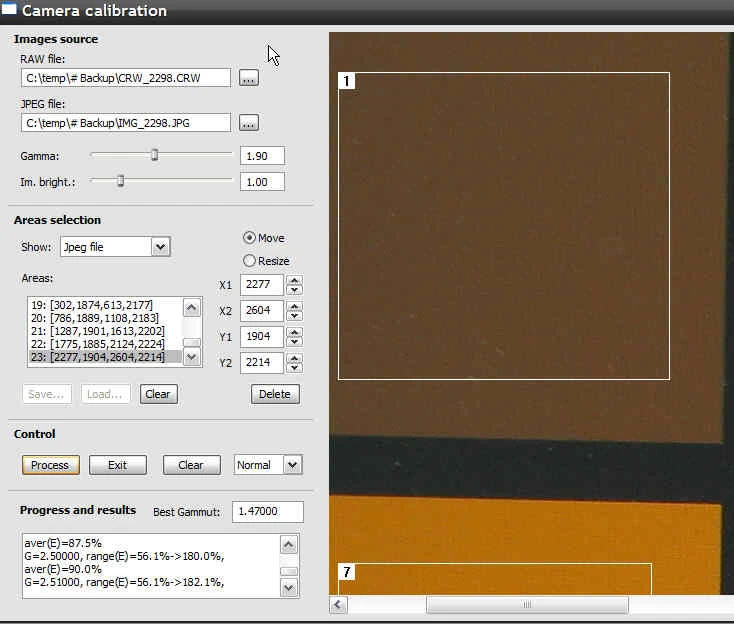
The Calibr button in the main program window opens the calibration windows.
Use the ... button next to the RAW file text box to select the .CRW or .CR2 file containing your calibration target photo. Upon selecting OK the corresponding JPEG will automatically be selected.
Gamma and Im. Bright sliders should be left at their defaults. Using the brightness slider will be explained later.
Resize the window (e.g. maximise it) to display the calibration photo.
The calibration target contains 24 color patches. A minimum of 22 of the color patches need to be marked (areas), with the dark grey and black patches (last two patches on the bottom row) being optional. Typically all color patches except for the black patch (i.e. 23 patches) should be marked, and the order in which they are marked is not important. To mark the patches:
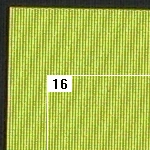
Use your mouse to click, drag and then release within a color patch. This will draw a rectangle highlighting the selected area. The area will also appear in the areas list, and its co-ordinates will appear in the "spinners" so the dimensions of the selection can be fine tuned.
Please make sure the contents of the selected area are all one color. This means you should leave some solid color around the selection to ensure color bleed does not impact the quality of the matrix.
Once the color patches have been marked, select the Process button to begin calibration. The Progress and Results text box will reflect the following calibration stages:
Quick pass to locate an approximate gammut for the image. If a minimum error level below 15% is found for any specific gammut, results are sufficient to proceed to the next stage. If the photo (or area selection) isn't sufficient to generate a good color matrix an error message will be displayed and processing will cease. If you see a message similar to below try the following to improve calibration before taking another photo of the target:
Use the Im. Bright slider to reduce the brightness to 0.5
Delete areas for the dark grey and black patches (two patches in the bottom right corner)
Check the area positioning, and adjust the position or sizing of areas that stray too close to the edge of a color patch
Check each area for visible issues with the target photo that may impact calibration. These could include smears, jagged lines, reflections on the screen, marks on the monitor's surface, etc. For jagged lines or smears on the screen consider increasing the refresh rate of your monitor and/or changing screen resolution.
Please make one change at a time and before using the Process button to restart calibration. Its also advisable to use the Clear button to clear the Progress and results area.
POOR RESULTS. CAN'T CONTINUE!!!
REQUIRES MIN <= 15.0%.
BEST RESULTS FROM G=1.47000, min(E)=56.1%
Performs a more detailed scan focusing on the range of gammut readings within 0.02 of the optimal gammut detected by the previous stage.
Performs a more detailed scan focusing on the range of gammut readings within 0.002 of the optimal gammut detected by the previous stage.
Performs a more detailed scan focusing on the range of gammut readings immediately after the optimal gammut detected by the previous stage.
Once the optimal gammut has been located the colors for the RAW and JPEG files are compared to generate the color matricies. This will produce results similar to below.
Verify the number of zones listed matches the number of areas you selected. If the numbers do not match that means some areas had minimum error rates higher than 10%. Review the CALCULATION section for areas containing the [bad!] log message, and see whether repositioning or resizing that area could minimize the error rate. If not you should consider adjusting the Im. Bright slider, or possibly retaking the calibration photo, to reduce the error rate.
If the number of zones and areas match, the XYZ -> Camera matrix: represents a color matrix that should be ready for use by DNG4PS-2.
RESULTS
White area: 17
Errors:
Zone 1: 5.6%
Zone 2: 3.5%
Zone 3: 3.9%
Zone 4: 8.1%
Zone 5: 7.4%
Zone 6: 4.3%
Zone 7: 6.3%
Zone 8: 6.5%
Zone 9: 2.9%
Zone 10: 7.1%
Zone 11: 4.8%
Zone 12: 9.4%
Zone 13: 7.6%
Zone 14: 9.6%
Zone 15: 7.9%
Zone 16: 7.2%
Zone 17: 2.6%
Zone 18: 9.6%
Zone 19: 9.3%
Zone 20: 6.7%
Zone 21: 6.8%
Zone 22: 9.5%
Camera -> XYZ matrix:
1.113316 0.458260 0.714667
0.092369 1.616806 -0.135772
0.084541 -0.584232 4.315776
XYZ -> Camera matrix:
0.937805 -0.325625 -0.165539
-0.055754 0.644974 0.029523
-0.025918 0.093690 0.238947
Verifying Matrix[]
TO DO: Confirm a way to test the matrix without modifying source code. Possibility below but requires some work.
# Download a copy of dngsetmatrix
# Use DNG4PS-2 to process a test photo.  It doesn't matter which camera's calibration is applied to the photo.
# Use dngsetmatrix to apply your new color matrix to the first color matrix field in the generated DNG, and potentially the second matrix as well. e.g.
 dngsetmatrix <DNGFileName> M1 0.937805 -0.325625 -0.165539  -0.055754 0.644974 0.029523  -0.025918 0.093690 0.238947
# Open the DNG a viewer/editor to confirm the results
Calibrate DNG4PS-2[]
Currently DNG4PS-2 calibration requires modifications to the source code. To request developers to apply your color matrix please post to the following thread. Please include:
Links to the calibration photos used
Links to test photos used to confirm the results
A text file including the processing log generated by DNG4PS-2


